
Working with Git in Android Studio
What is Git?
Git is an open-source distributed version-control system for tracking changes in any set of files.
Benefits of Git:
- Excellent support for parallel development, support for hundreds of parallel branches.
- Performance: Git provides the best performance when it comes to version control systems. Committing, branching, merging all are optimized for a better performance than other systems.
- Security: Git handles your security with the cryptographic method SHA-1. The algorithm manages your versions, files, and directory securely so that your work is not corrupted.
- Branching Model: Git branching model lets you have multiple local branches that are independent of each other.
- Distributed: Git is distributed in nature. Distributed means that the repository or the complete code base is copied onto the developer’s machine so that he can work on it.
- Open Source: This is a very important feature of any software present today. Being open-source invites developers from all over the world to contribute to the software and make it more and more powerful through features and additional plugins.
Github, Bitbucket, Gitlab, etc.
With Git we also come across Github, Bitbucket, Gitlab, etc. What are they?
They are companies that provide hosting for Git repositories along with other features to enhance collaboration between a development team.
They support public and private GitHub repositories.
VIDEO TUTORIAL
Setup Git in Android Studio
Follow the steps to setup the Git in Android Studio:
1. Open Android Studio and navigate to Preferences -> Version Control -> Git and check if the Git path is already there or not. If not then download the Git from here. Once downloaded navigate to the same screen again and click on the Test button, it will show the installed version.


2. Now go to VCS -> Enable Version Control Integration and click on it. After that select Git from the dropdown and click Ok.


3. On clicking the Ok button it will initiate git in your project and your all files colors will get changed to Brown. That means git initialization is a success. You can initialize git from the terminal as well via the below command:
|
1 |
git init |

4. Now open the terminal and run the below command to check the status of files that are added, modified, deleted from the project but not yet committed.
|
1 |
git status |

Creating a Repository in Github
After initializing git in the project let’s go ahead and create a Repository in Github to host our project over there. Follow the steps to do so:
1. Open the https://github.com/ URL and Login with your account. If not Registered yet then do SignUp.
2. Now click on the New button to create a new repository. It will ask you to enter the Repository name and select the public or private hosting.

3. Once done with step 2 click on the Create Repository button. On successful repository creation, it will show you a screen with git terminal commands as follows:
–> Create a new repository on the command line.
–> Push an existing repository from the command line.
–> Import code from another repository.

Connecting a Github Repository with Project
After creating Repository over Github we have to connect the remote repository with our Android Studio project. To do that follow the below steps:
1. Copy the command you get after creating a repository from Github and run it in the Android Studio terminal.
|
1 |
git remote add origin repo_url |

2. Now to commit the files firstly we have to add them. You can use any one of the below commands to add your files.
|
1 2 3 4 |
//to add all files git add . //to add selected file git add file_name |


3. After adding files now we can commit our files. To commit run the following command:
|
1 |
git commit -m "commit message" |
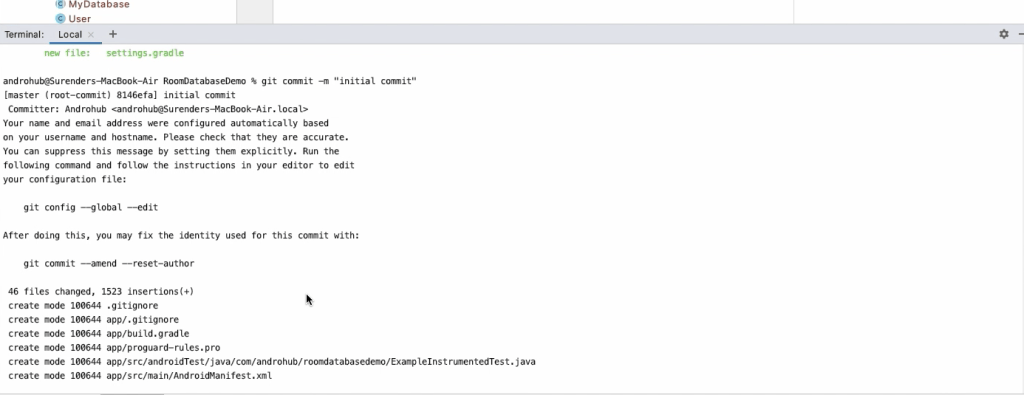


Once you commit your files the color will get change back to normal(black) which means the commit is a success.
4. Now we have to push the code to the remote repository. To do that run the below command:
|
1 |
git push origin branch_name |

If you are pushing for the first time then it might ask you for your credentials.


5. To take a pull from the remote repository run the below command:
|
1 |
git pull origin branch_name |
Git Operations from Toolbar
1. To commit the code from toolbar navigate to VCS -> Commit.

2. It will open a window where you can see all the added/modified/deleted files and also it provide side-by-side file differences. Just add the commit message and click on the Commit button.

3. If you are committing for the first time then it will ask you to configure git user as shown in below image.

4. You can see list of all branches by clicking on master branch at the bottom rright.

Cloning an Existing Github Repository
To clone an existing repository from Github to your local machine use the following steps:
1. Open the repository in GitHub and click on the Code button and copy the URL from the HTTPS tab.

2. After copying the URL navigate to Android Studio and go to File -> Open -> Project from Version Control.

3. A window will open where we have to paste our URL and provide the directory path where we have to clone it and hit the Clone button.

4. On a successful clone it will open the project in Android Studio and you can work on the code and once you are done with your changes commit your changes and push the code to GitHub.
Stashing & Unstashing Changes
Let’s suppose we are working on some branch and in between some urgent requirement came or we have to stop current work to work on the other branch. So in that case either we can commit our changes but since the changes are not completely implemented then, in that case, we can use the Stash/Unstashing mechanism.
1. To Stash changes navigate to VCS -> Git -> Stash Changes.

2. It will open a window where we have to enter the stash message and click on Create Stash button.

3. Once you are done with your requirement and you want your changes to be unstash then navigate to VCS -> Git -> UnStash Changes.

4. It will open a window to select the code to be unstashed. Select the stash and click on Apply Stash and it will bring your code back.

.gitignore
Let suppose you have some files or folders that you don’t want to push to the remote repository then you can add those files in the .gitignore file and the git won’t track those files.

Tips:
1. Make a habit to push your code on a daily basis so that you don’t lose your code.
2. Before pushing your code to the remote branch take a pull from the remote branch and merge it after that you can push your changes.
Thanks. ![]()